FERRANDI Pâtisserie Diaries Part 2 | Tarte aux Fraises
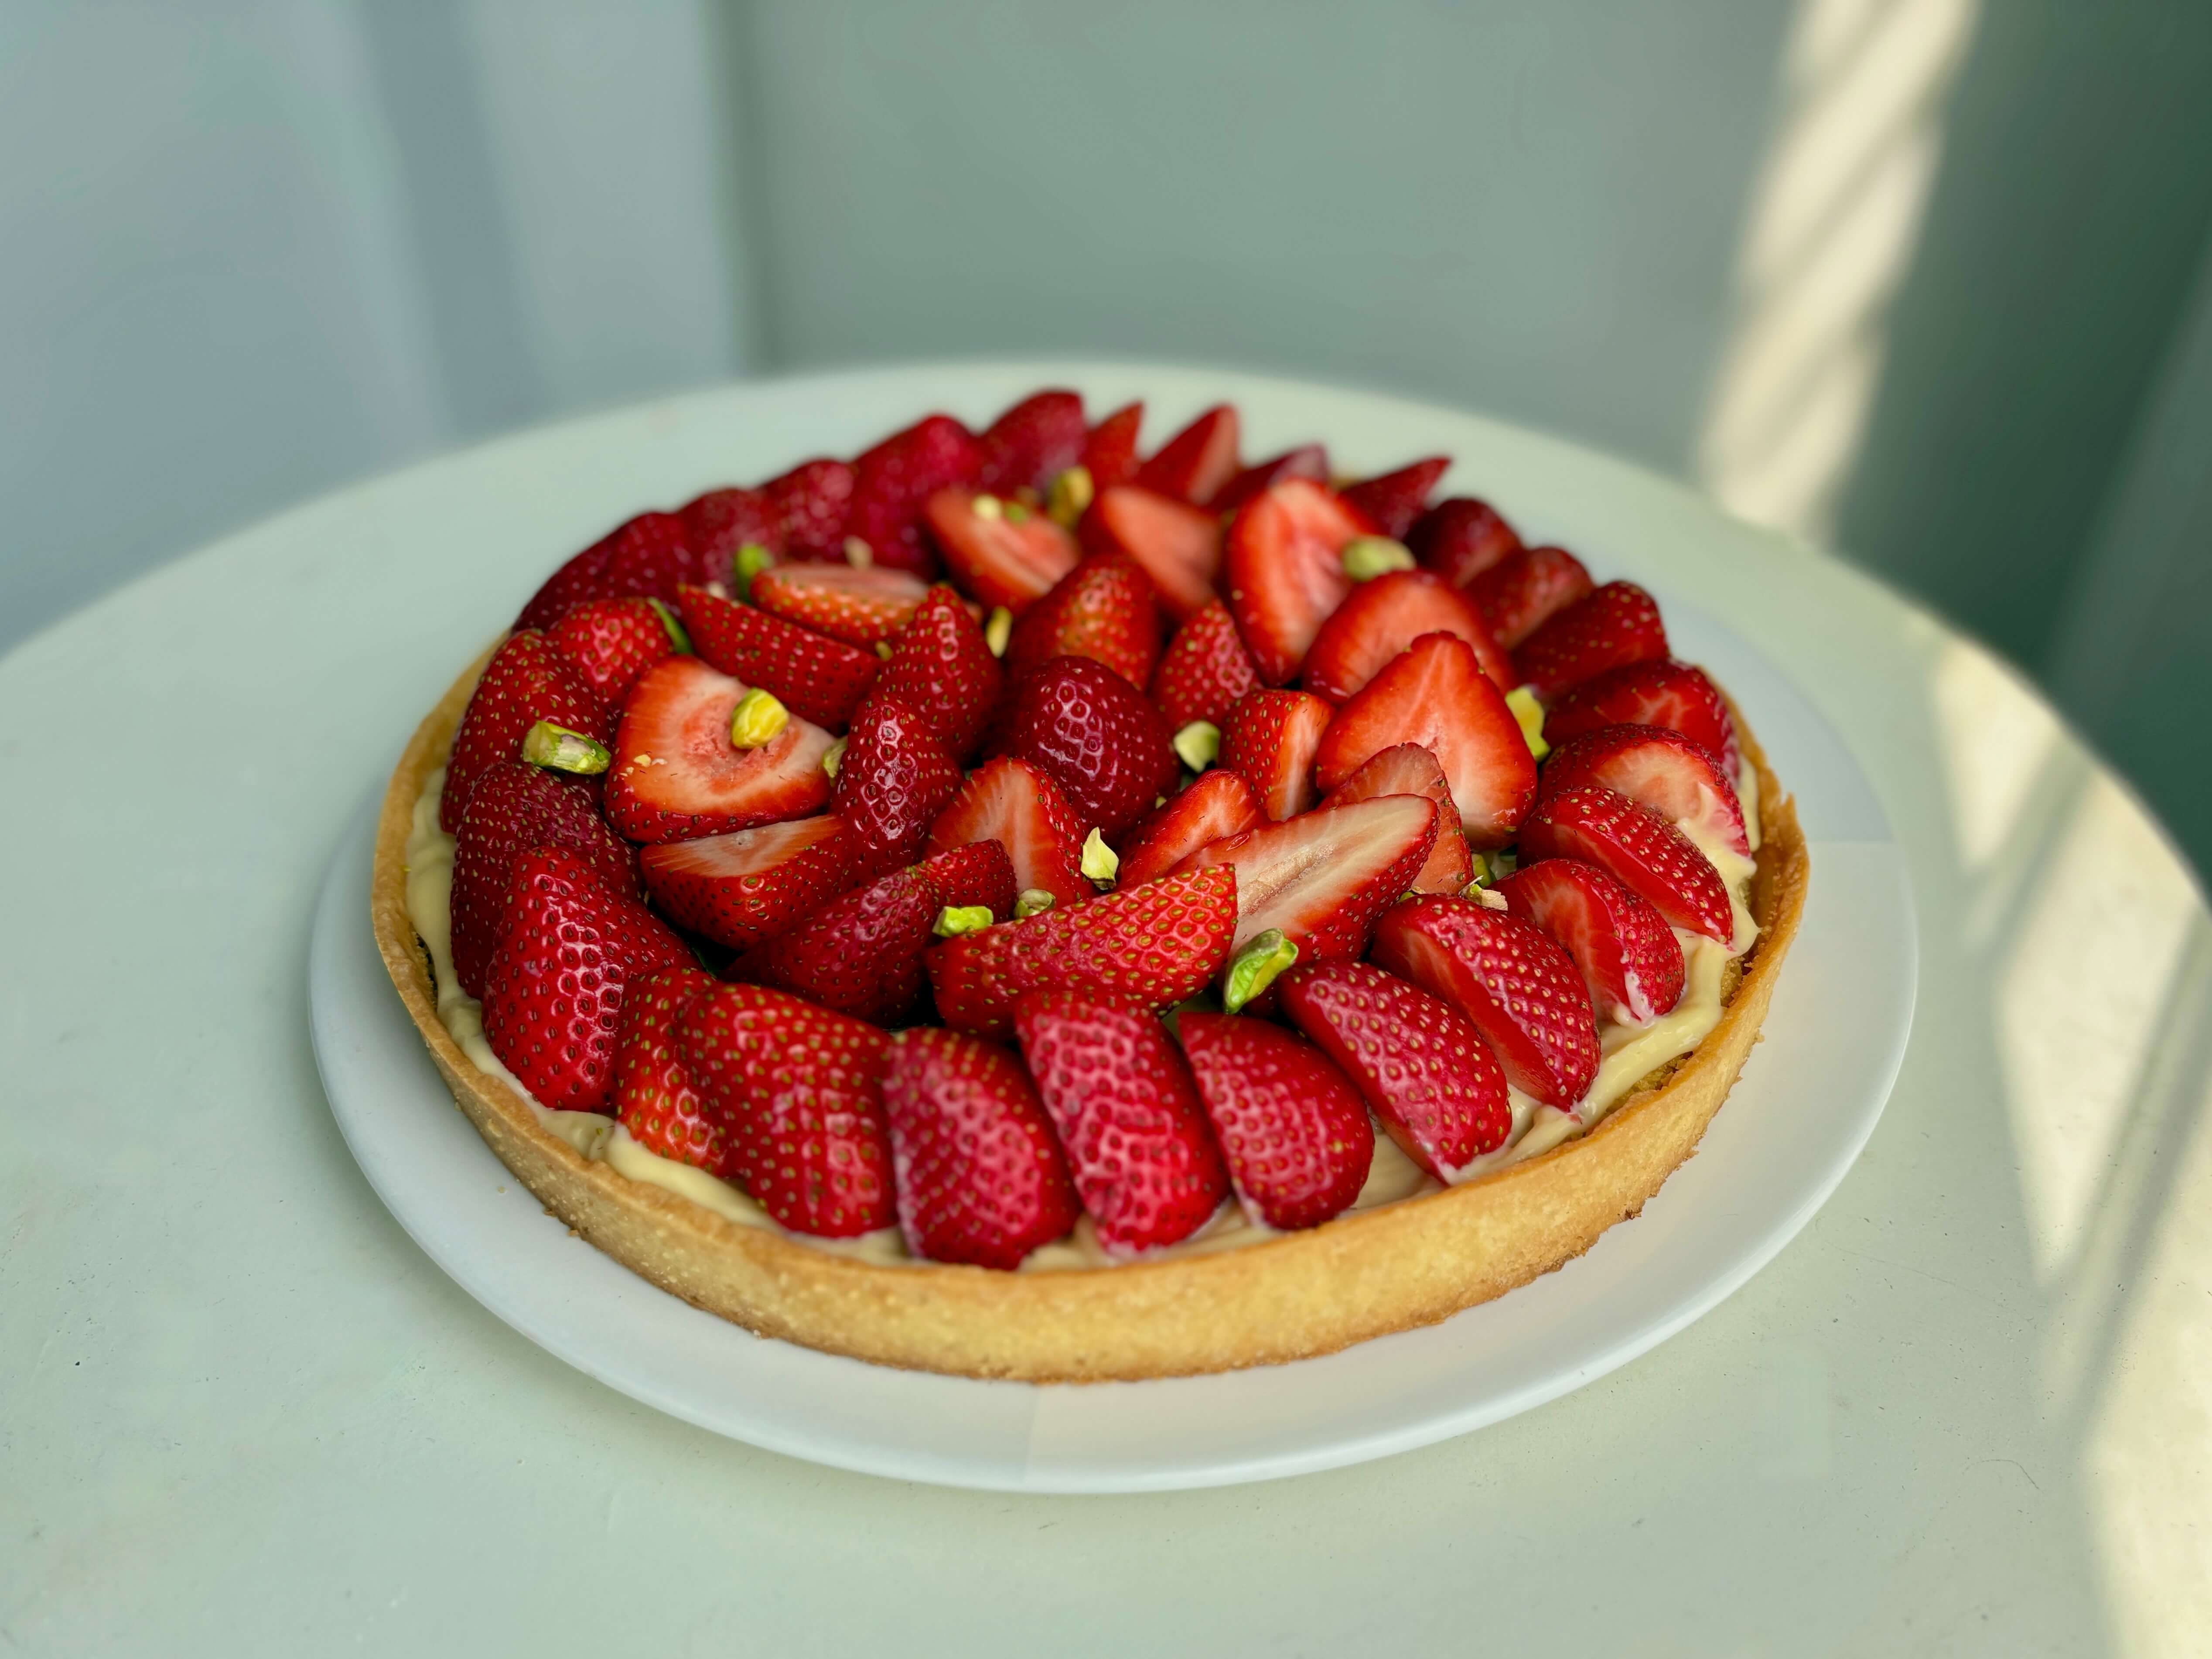
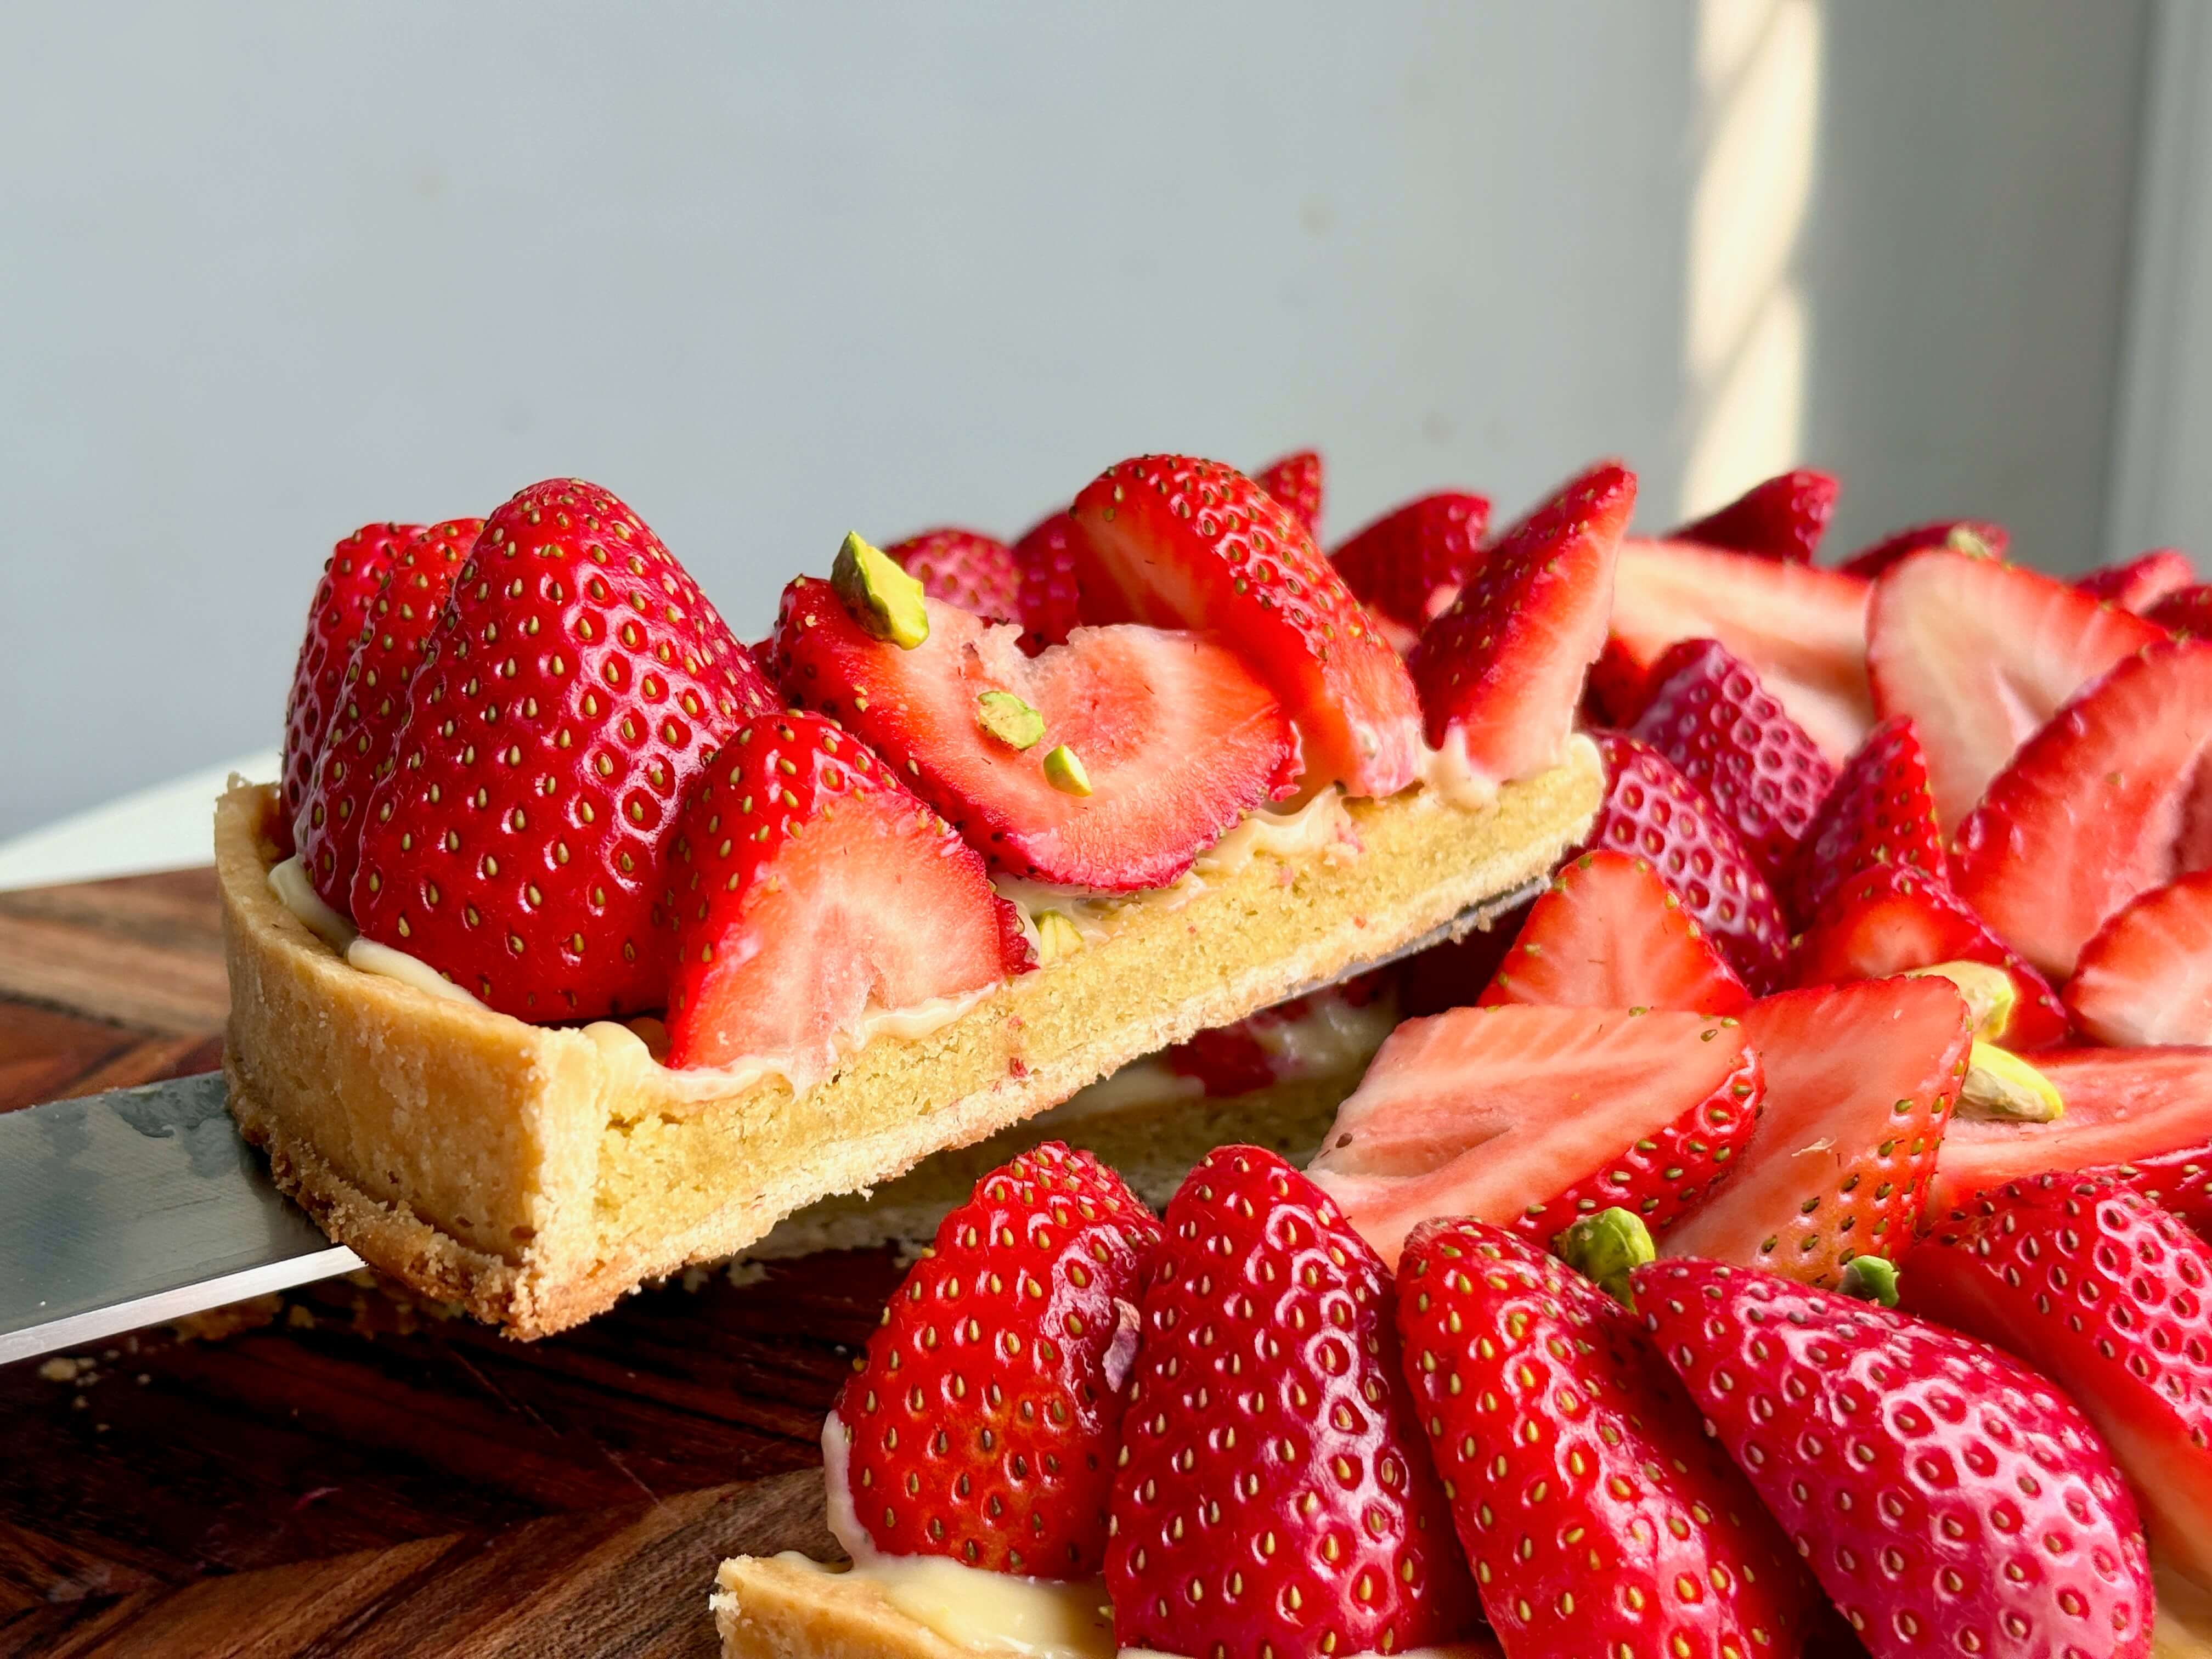
From what I ate when I was in France last year, the traditional tarte aux fraises (strawberries) and tarte aux framboises (raspberries—my Mum's personal favorite pâtisserie) generally have the same structure, including a tart pastry shell, crème pâtissière, fresh fruit on top, and maybe a glaze of thinned jam. The FERRANDI book elevates this idea a little bit in their Level 1 tarte aux fraises recipe, adding an almond/pistachio frangipane underneath the crème pâtissière.
This time, I tried to take a few more pictures throughout the process of making the tart... I hope that this can help me look back and remember what I did wrong so I can improve! Also, a confession I have is that I did not make the strawberry jelly that was supposed to be used for a shiny glaze on top... I was not home and did not have a pastry brush or the will to put the glaze on without one! Another sin is that it is not strawberry season at all. I'll have to remake this tart with some fresh strawberries from the farmers' market in June to really understand its true potential.
Did I Improve on My Pastry?
Instead of a pâte sucrée like in the Tarte au Citron, the base for this tart is a pâte sablée. Sablée means "sand" in French, and this pastry is named as such because it involves making a sand-like mixture with the dry ingredients and butter before adding in the liquid ingredients. Based on some brief research, the pâte sablée is much more crumbly and delicate, vs. the crispiness of its cousin, the pâte sucrée. It would be fun to do some tests to compare the different tart pastries and what each is best for.
Random thought: It's interesting learning from a book like this because I can tell that they leave out quite a lot of the really detailed instructions. I find myself using my years of knowledge and intuition a lot more than I do in other cookbooks. In my mind, they expect you to already have some experience.
Pâte Sablée Ingredients
- 100g flour
- 15g almond flour
- 40g confectioners' sugar (powdered sugar)
- 1g salt
- 60g butter, diced
- 1/2 tsp vanilla
- 20g beaten egg (1/2 egg ish)
I started out by whisking the flour, almond flour, sugar, and salt together in a bowl (this could also be done in a stand mixer, but I didn't have mine at the time). Then I added the butter (mine was room temp, but I think next time it should be cold - my mistake) and mixed it into the other ingredients until it looked like sand. I then added the beaten egg and mixed until a dough just came together. I then shaped it into a disk around 1/2-inch thick and chilled it for 30 minutes as instructed.
I can't believe I'm writing down another confession, but here we are. For those who read Day 1, remember when I said I needed to adjust the recipe to match the volume of my tart ring? I forgot! It was only as I was rolling out this pastry that I realized I had forgotten to make one of the biggest edits I needed to make, haha.
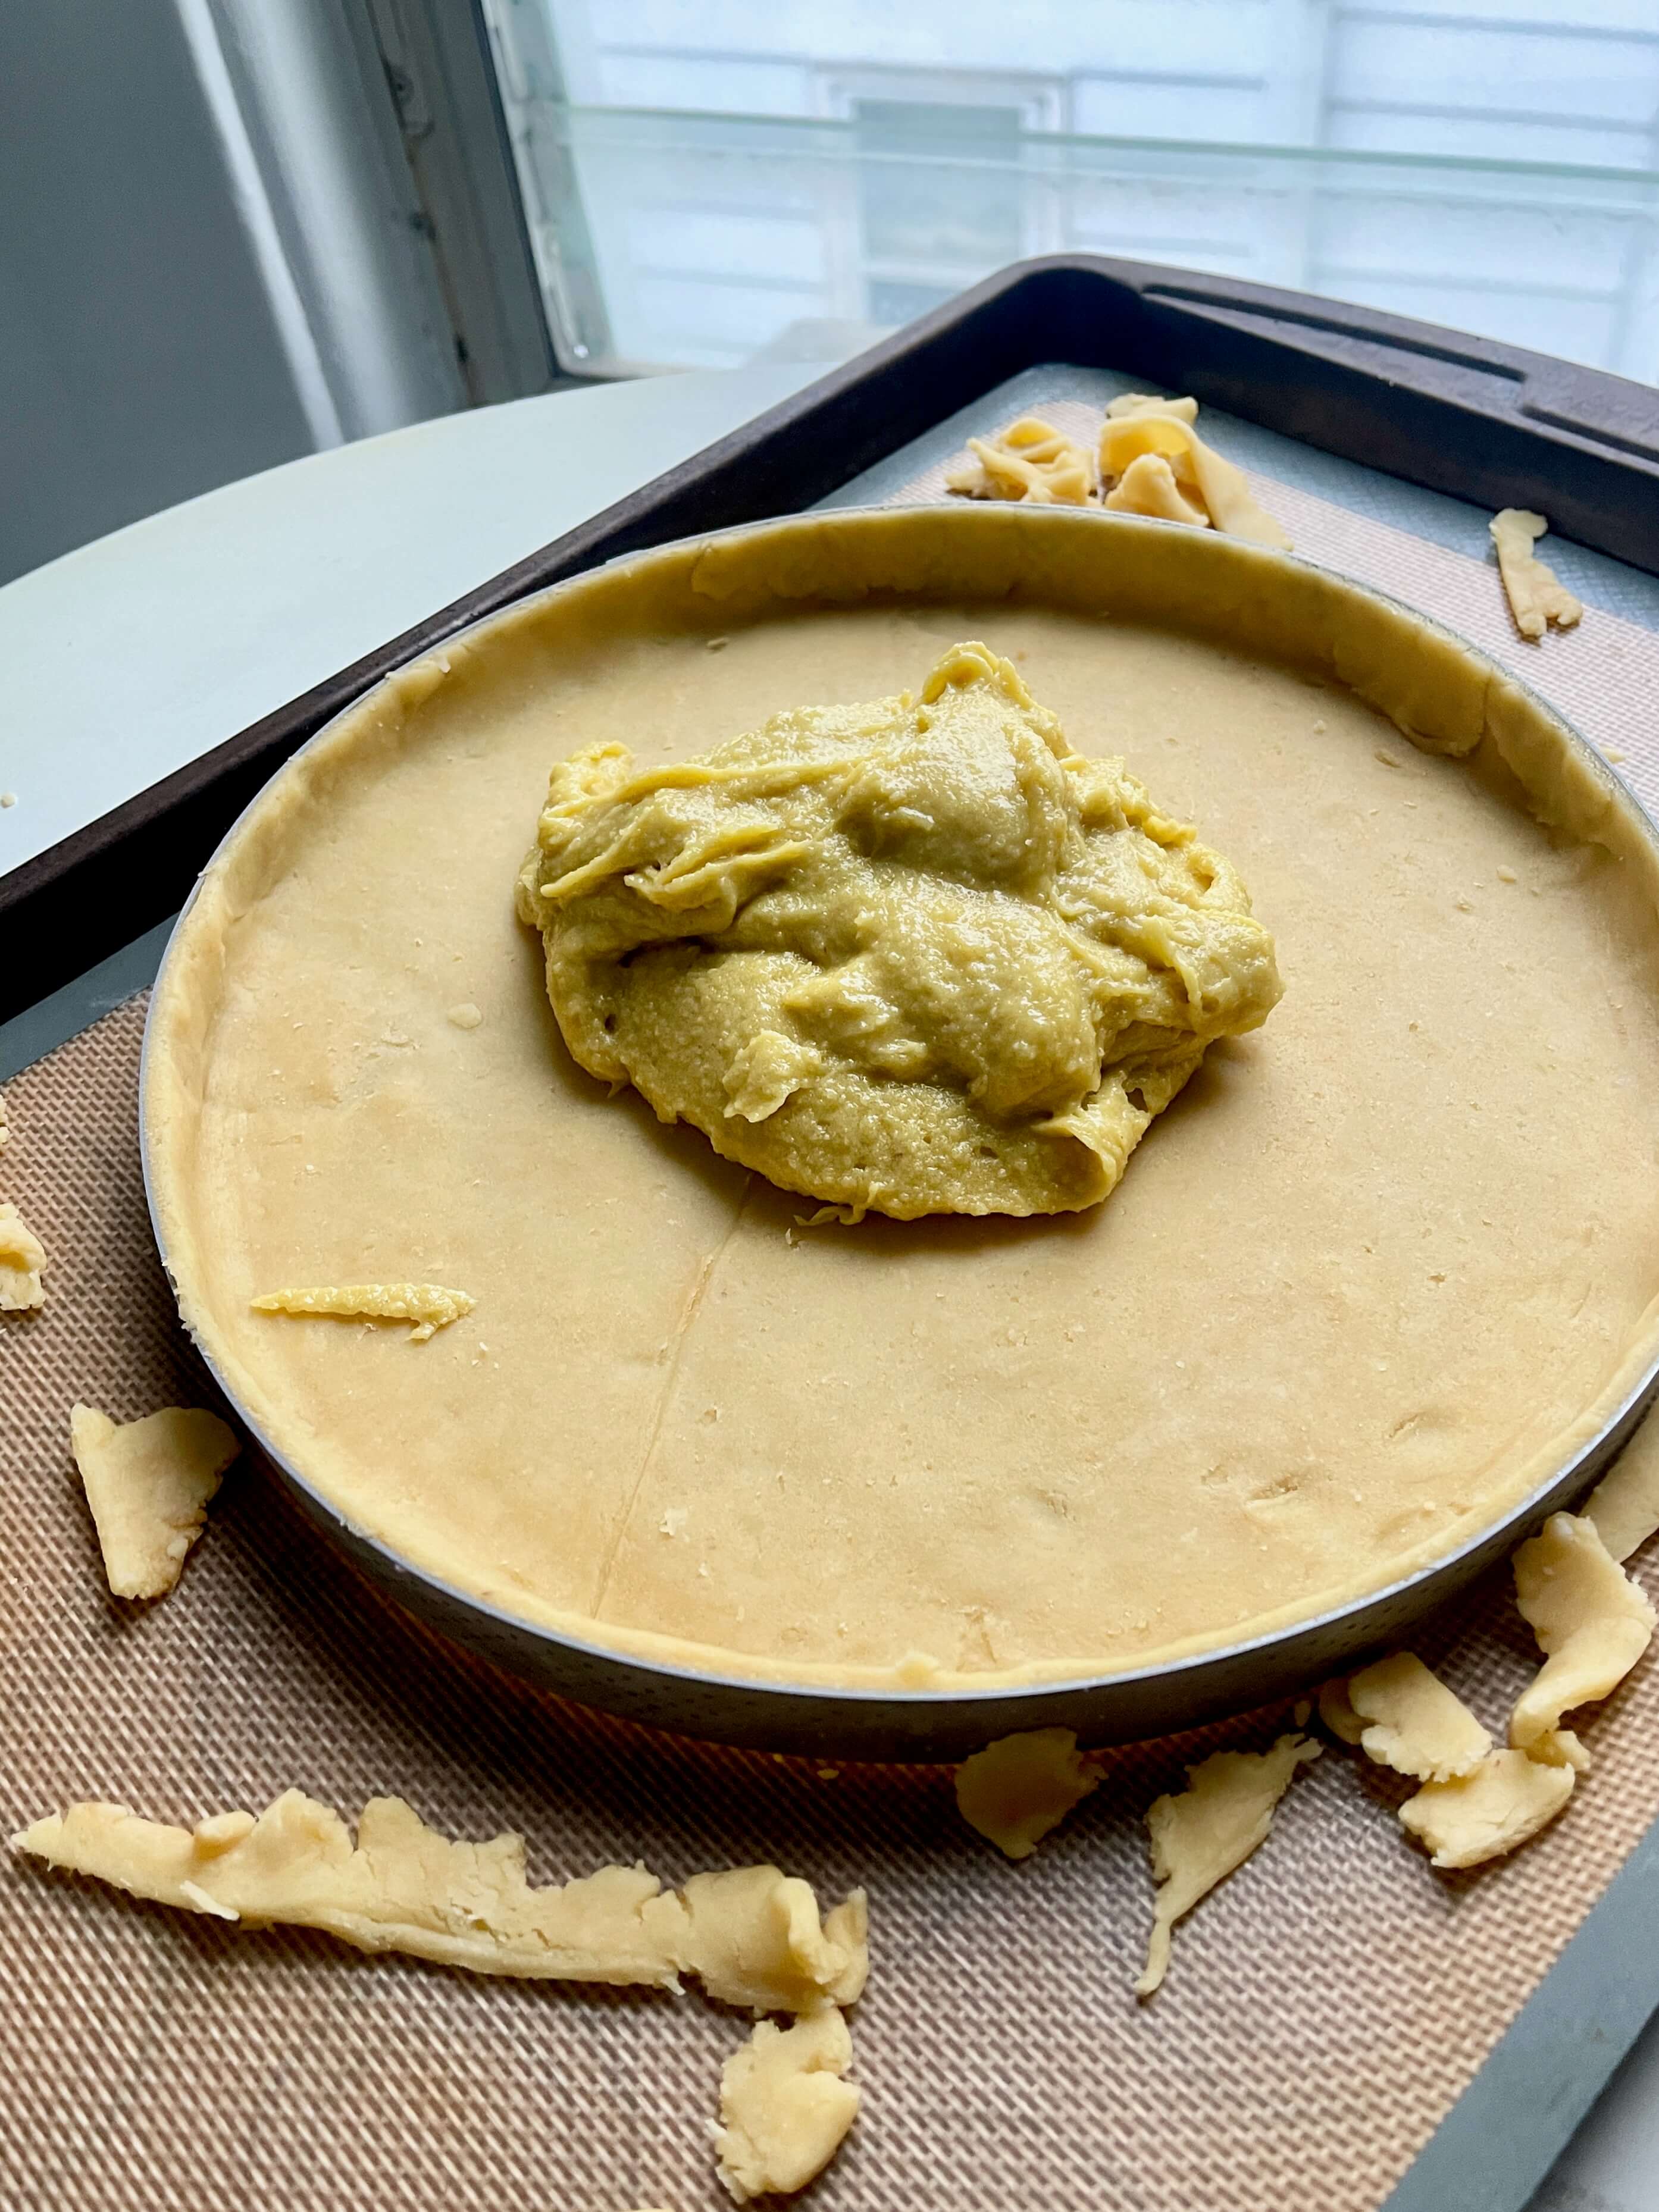
So oh well, the pastry shell was thin again, but this time I rolled the dough between two pieces of parchment paper. It worked pretty well, but I had some sticking and breakage occur when I transferred the dough from the parchment on top of the ring. It was a lot less than last time... I think that once I can roll my dough a bit thicker and keep it even cooler, then it will be smooth sailing. My edges were much cleaner this time, though! I trimmed the sides with a sharp knife just before I put the ring in the freezer to chill for 10 minutes. I ended up having some collapsing of my tart walls, but I think it was just because it was way too thin. I honestly might just get a smaller tart ring to make my life a bit easier.
"Basic" Tart Filling
This is just an idea I have been pondering that is slightly humorous that I wanted to share. Upon my completion of this tart, my boyfriend remarked that it was funny that the only thing that made this tart "strawberry" was the fact that there were strawberries on top. He said, "So, the filling is a basic filling, then it's just topped with strawberries, so it's a strawberry tart?" I was slightly offended by these comments simply due to the fact that he called my almond/pistachio frangipane + crème pâtissière BASIC??
Alas, we determined in the end that he didn't mean "basic" as in simple/easy/boring; he meant that it could be a base for a lot of different fruit tarts (raspberry, cherry, nectarine, mango, etc.)... which I suppose is true (don't tell him I'm admitting that). I guess for the French classics, the addition of the fruit is meant to be simple in these tarts. Like the Tarte au Citron, the fruit is celebrated. And how better to celebrate a fruit like a strawberry than in its pure form (especially if it's in season!)?
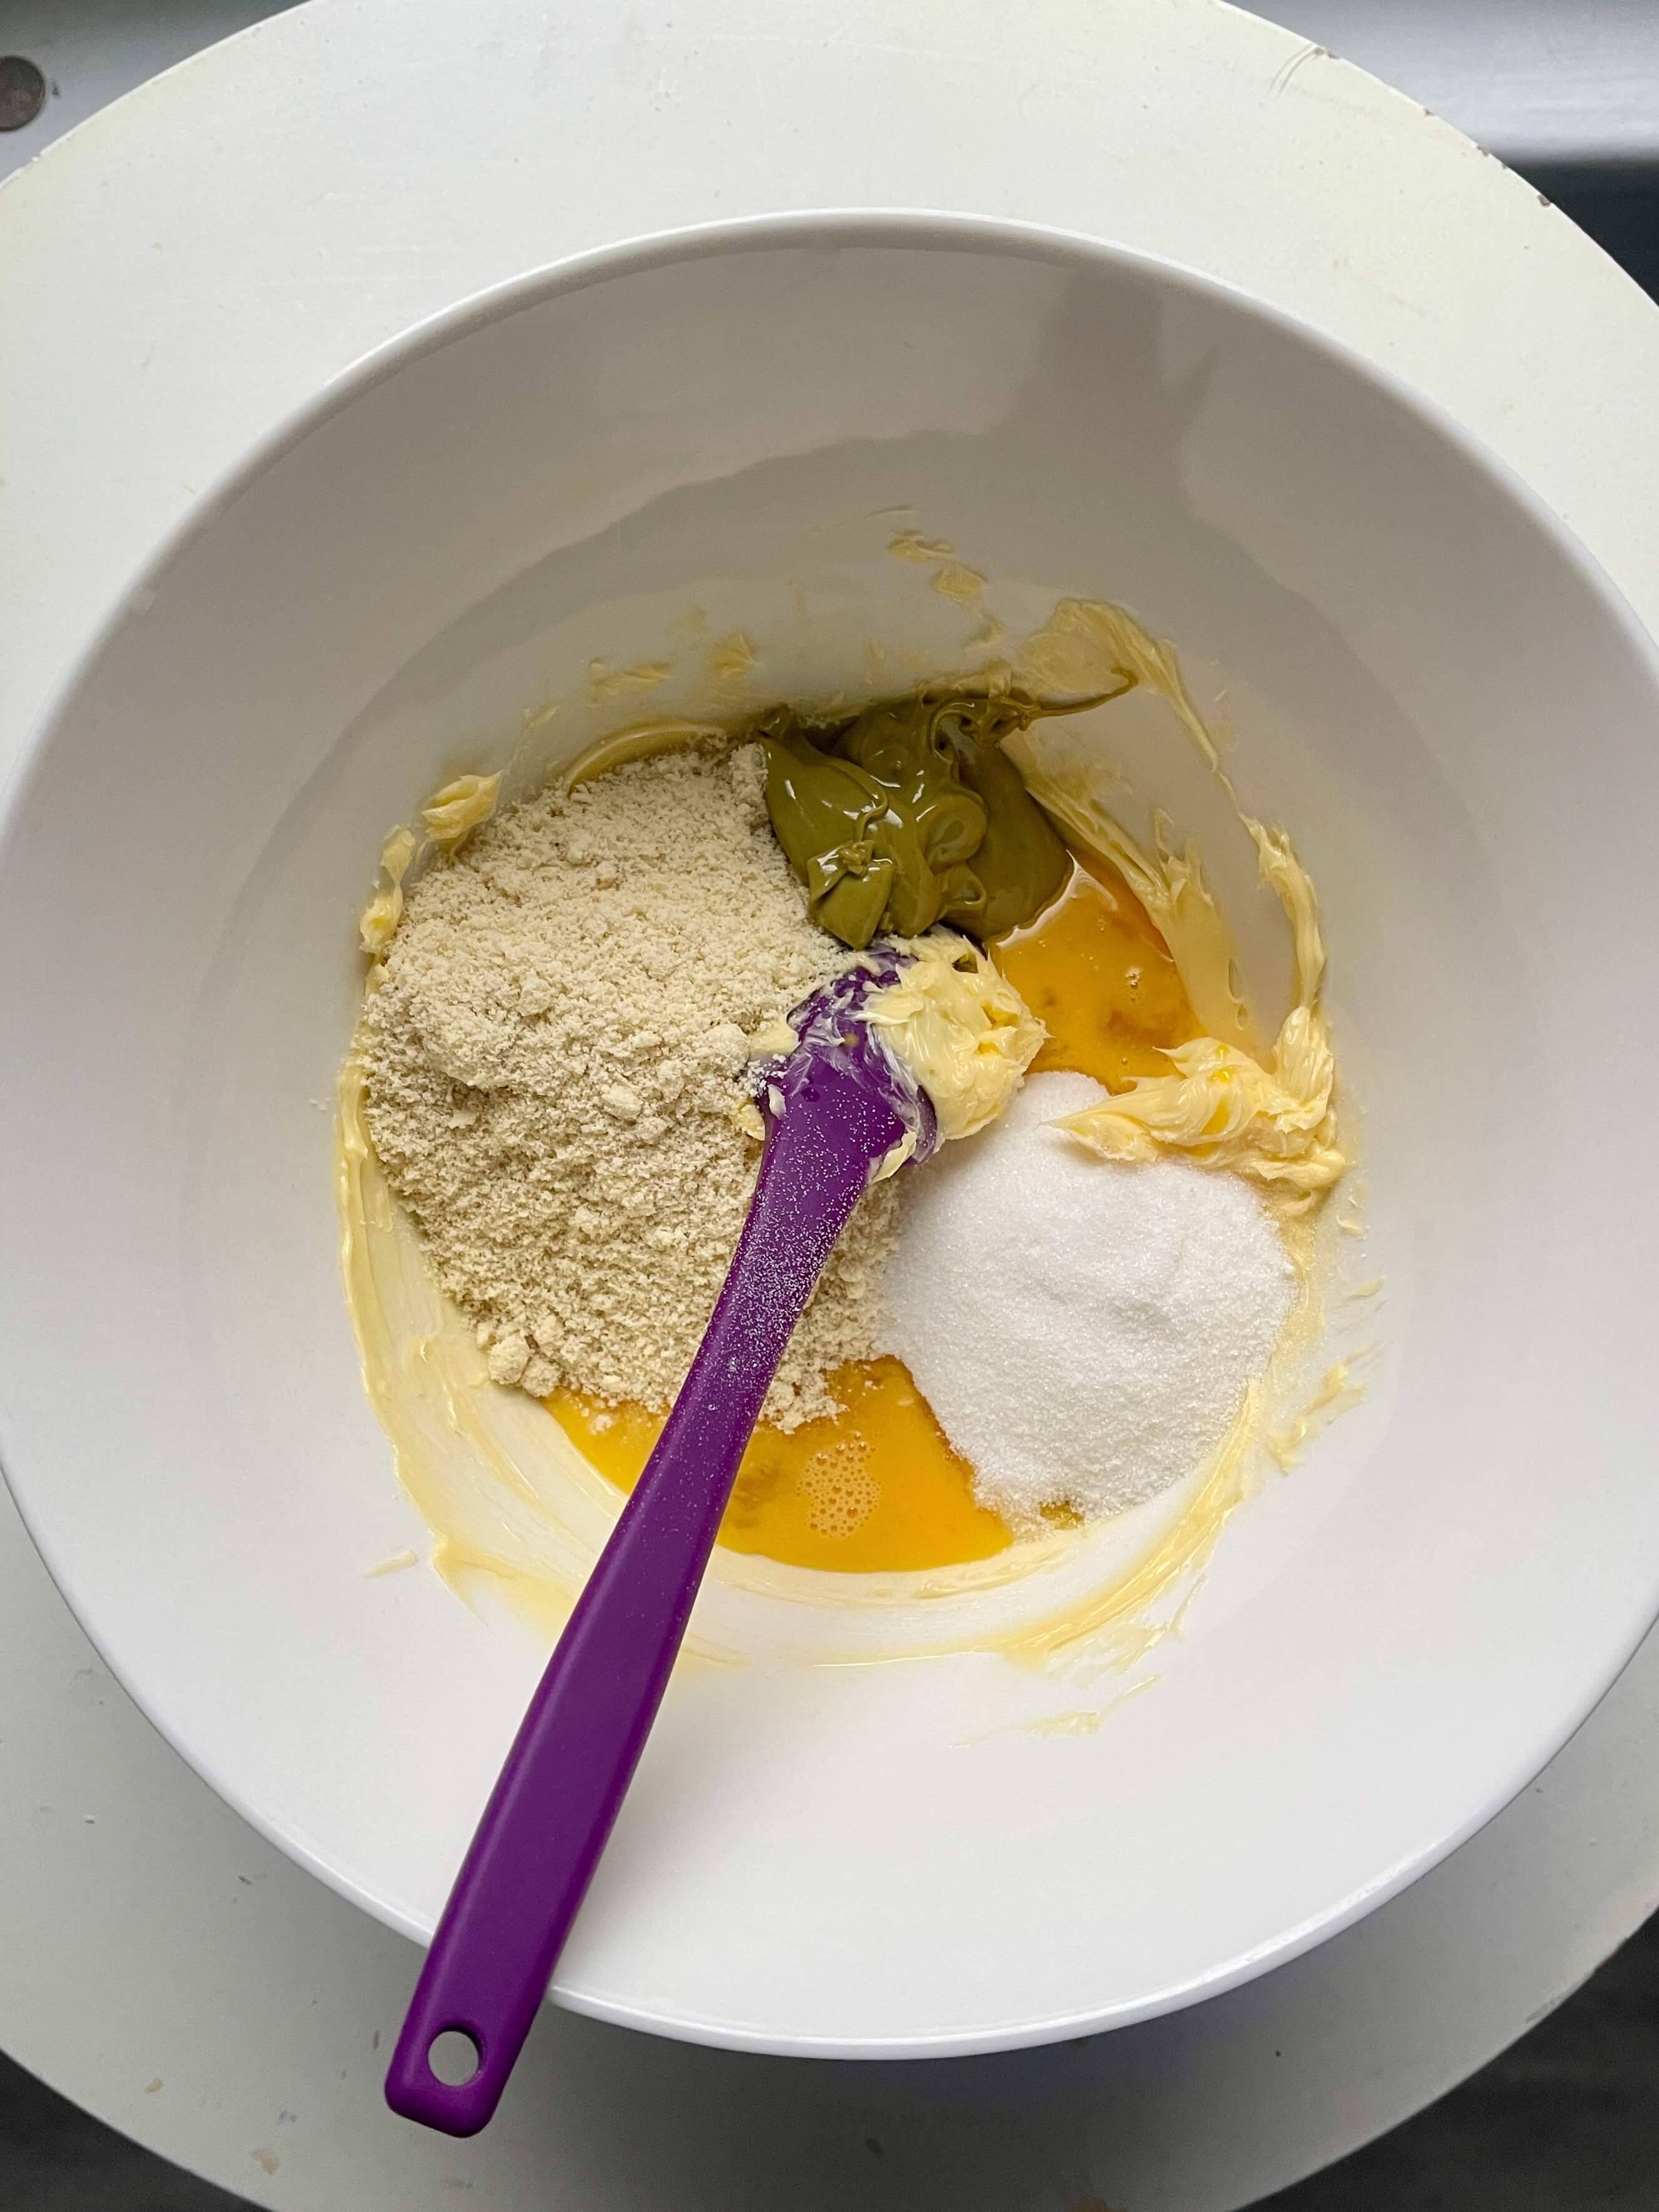
Almond-Pistachio Frangipane Ingredients:
- 60g butter diced, at room temperature
- 60g sugar
- 60g almond flour
- 25g pistachio paste
- 50g beaten egg
After placing the tart ring in the freezer, I preheated the oven to 325°F and got started on the frangipane. I beat the butter in a bowl until creamy and then added the sugar, almond flour, egg, and pistachio paste (I used pistachio cream from Costco - it was hopefully the same idea). I beat the mixture with a spatula until it was smooth. Frangipane is so satisfying when it comes together. My go-to summer party tart is an almond frangipane, nectarine, and raspberry tart; it's so simple yet so good. Recipe to come for sure!
I added the frangipane to the chilled ring, smoothed it out, and placed it in the oven for 30 minutes, rotating it halfway through. The frangipane was slightly golden coming out, and it smelled very good. The tart shell had some areas that fell slightly, an issue I can attribute to the very thinly rolled pastry - which I PROMISE I will fix next time.
Crème Pâtissière Ingredients:
- 125ml milk
- 25g sugar
- 25g egg yolk
- 12g cornstarch
- 20g butter
To make the crème pâtissière, I first heated the milk with half the sugar until it was just under boiling. In the meantime, I whisked the rest of the sugar with the egg yolk, followed by the cornstarch.
The part where you have to be the most careful with crème pâtissière is adding the hot milk to the raw eggs. You must constantly whisk to avoid any scrambling of the eggs. Once you've added all the milk, you transfer the mixture back into the saucepan and heat it over the stove until boiling. You must again whisk constantly here to avoid any burning of the mixture. Because of the cornstarch, it will thicken quite quickly. My crème pâtissière ended with a pudding-like consistency. I cooked it for 2-ish minutes after boiling occurred.
To assemble the tart, I smoothed the crème pâtissière over the baked frangipane filling and topped it with circles of halved strawberries, followed by a sprinkling of chopped pistachios. Overall, it looked pretty similar to the one in the book, except I think they use more uniform strawberries, haha. It also could have looked a bit better with the strawberry jelly glaze, but who is really too concerned about that!
What I Can Improve Next Time
The tart shell: Enough said...I'll buy the smaller tart ring
Assembly: It's a little clumsy, but I'm learning. I think I'll give myself some grace in this area.
Final Thoughts
A little more complicated than Day 1, but nothing I haven't made before. I love tarts like this even if they are annoying to store. I may have taken off all of the strawberries after assembling it and put them in an airtight container so they would keep for longer - a trait from my Mum, hehe.
Comments & Notes
Be the first to leave a note!